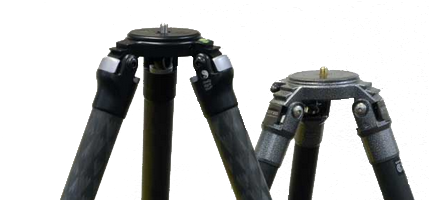


삼각대 관리
Even though cleaning your tripod may appear daunting at first, it is a fairly simple task that will add years of use. 삼각대 청소는 처음에는 힘들어 보일지 모르지만 몇 년 동안 사용하게 될 간단한 작업입니다. Even if you don't go all out "Special Forces" in the mud and gunk with your gear, you should still practice a little routine cleaning after each shoot. 장비로 진흙과 덩어리에서 "특수 부대"를 모두 꺼내지는 않더라도 촬영할 때마다 약간의 일상적인 청소를해야합니다. Any time you submerge your tripod in water or mud, you should give it a more thorough cleaning to ensure you don't embed grit between the plastics and carbon fiber. 물이나 진흙에 삼각대를 잠기 게 할 때마다 플라스틱과 탄소 섬유 사이에 모래를 묻히지 않도록 철저히 청소해야합니다. We cover Versa & Gitzo maintenance in one tutorial, since there is a lot of crossover. 크로스 오버가 많기 때문에 Versa & Gitzo 유지 관리에 대해 한 가지 자습서로 설명합니다. If any of the cleaning steps vary for a Gitzo tripod, you will see that variation noted. Gitzo 삼각대의 청소 단계가 다를 경우 해당 변형이 표시됩니다.
Cleaning your tripod will take some time, but it can save your shot when you need to rely on your gear the most. 삼각대를 청소하는 데는 시간이 걸리지 만 장비에 가장 의존해야 할 때 촬영할 수 있습니다. Now is also the perfect time to check all the plastic parts for cracking. 이제는 균열에 대한 모든 플라스틱 부품을 검사하는 완벽한 시간이기도합니다. An abrupt shock to the legs can cause micro cracks in the plastics and can get worse with time and use. 다리에 급격한 충격이 가해지면 플라스틱에 미세 균열이 생길 수 있으며 시간이지나면서 악화 될 수 있습니다. This is true for any brand of tripod. 이는 모든 브랜드의 삼각대에 해당합니다.
What you need before you begin: 시작하기 전에 필요한 사항 :
2 or 3 bins/boxes to hold parts, source of running water, towel, and optionally a touch of grease. 흐르는 물의 공급원, 수건 및 선택적으로 기름칠의 접촉을 유지하기 위해 2 개 또는 3 개의 통 / 상자.
Step 1
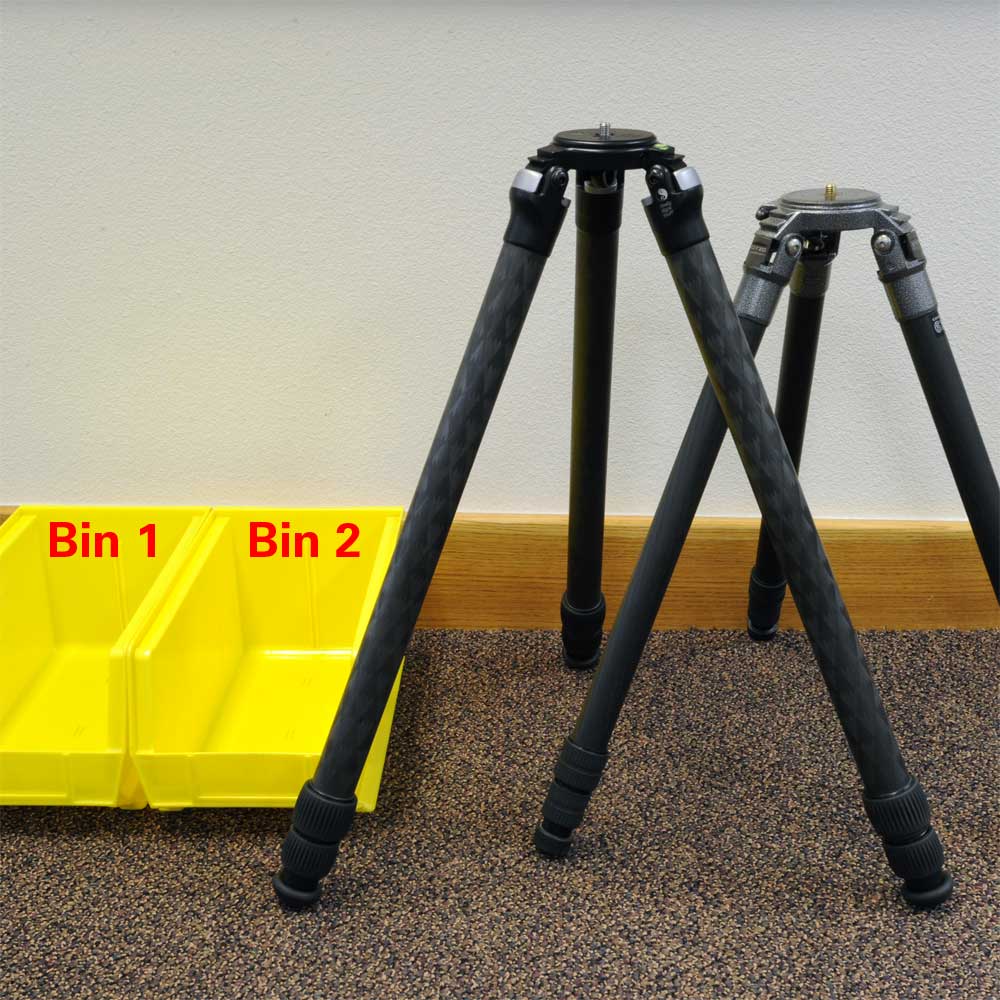
다리 당 3 개의 다리 섹션이있는 삼각대가있는 경우 부품 용 2 개의 상자 / 상자를 설치하십시오. Set up 3 bins if your tripod has 4 leg-sections per leg. 삼각대에 다리 당 4 개의 다리 섹션이 있으면 3 개의 상자를 설치하십시오.
Step 2
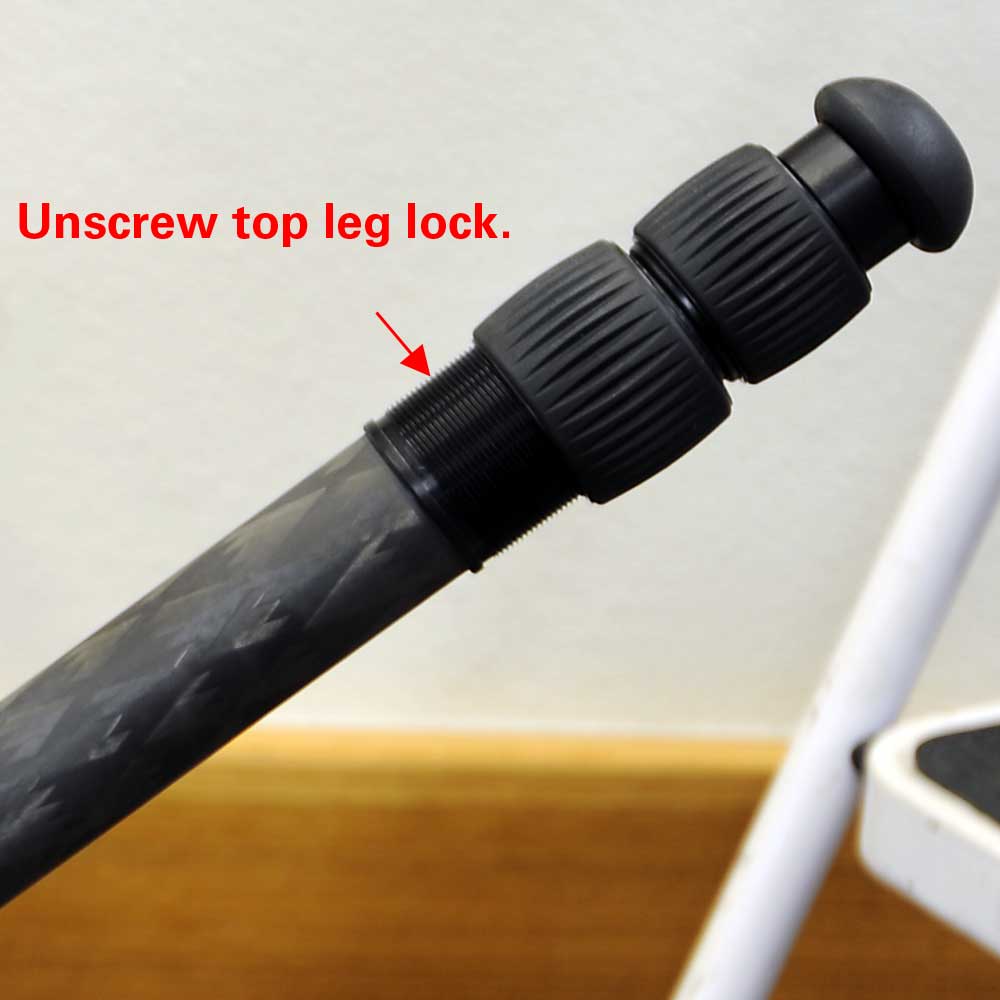
상부 비틀림 잠금 장치의 나사를 풀어주십시오.
Step 3
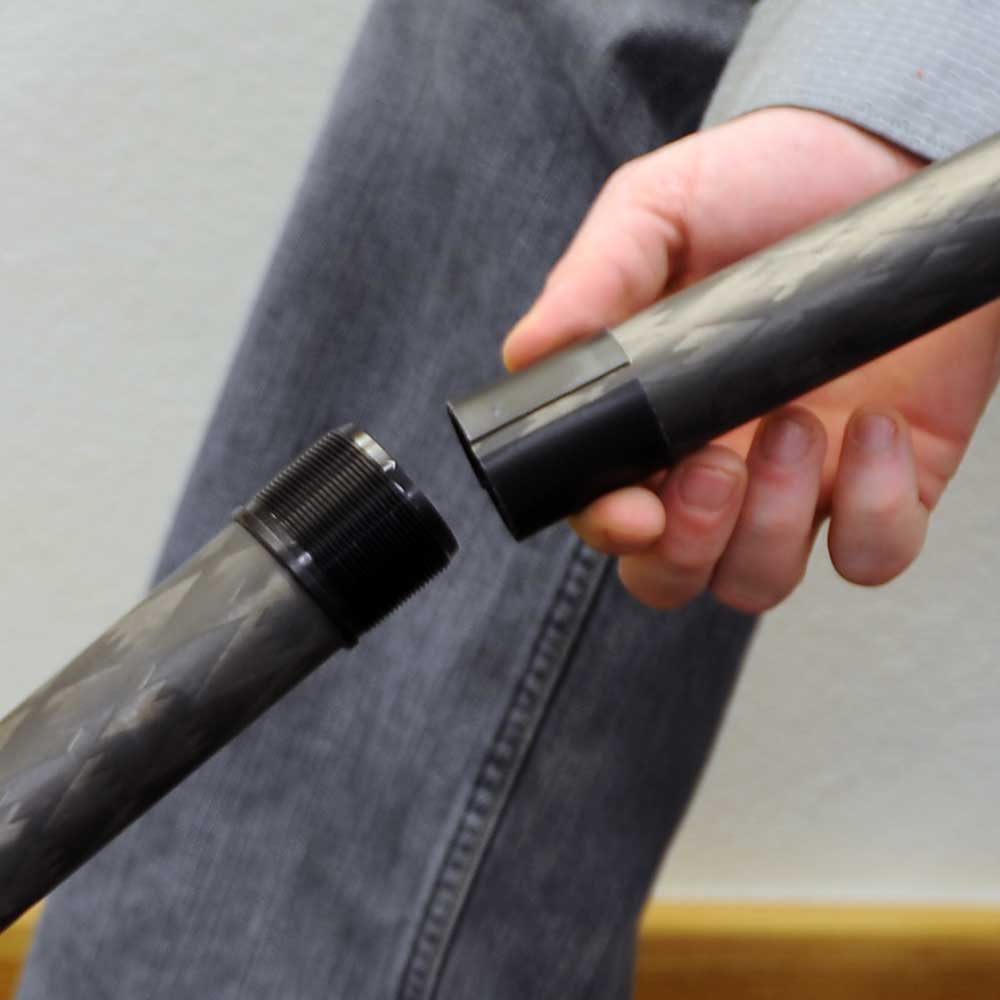
상부 비틀림 잠금 장치가 완전히 풀리면 하단 다리를 상단 다리 부분에서 완전히 빼냅니다. Place the two plastic pieces and the twist lock in one container. 두 개의 플라스틱 조각과 트위스트 락을 하나의 용기에 넣으십시오.
Step 3A - Gitzo
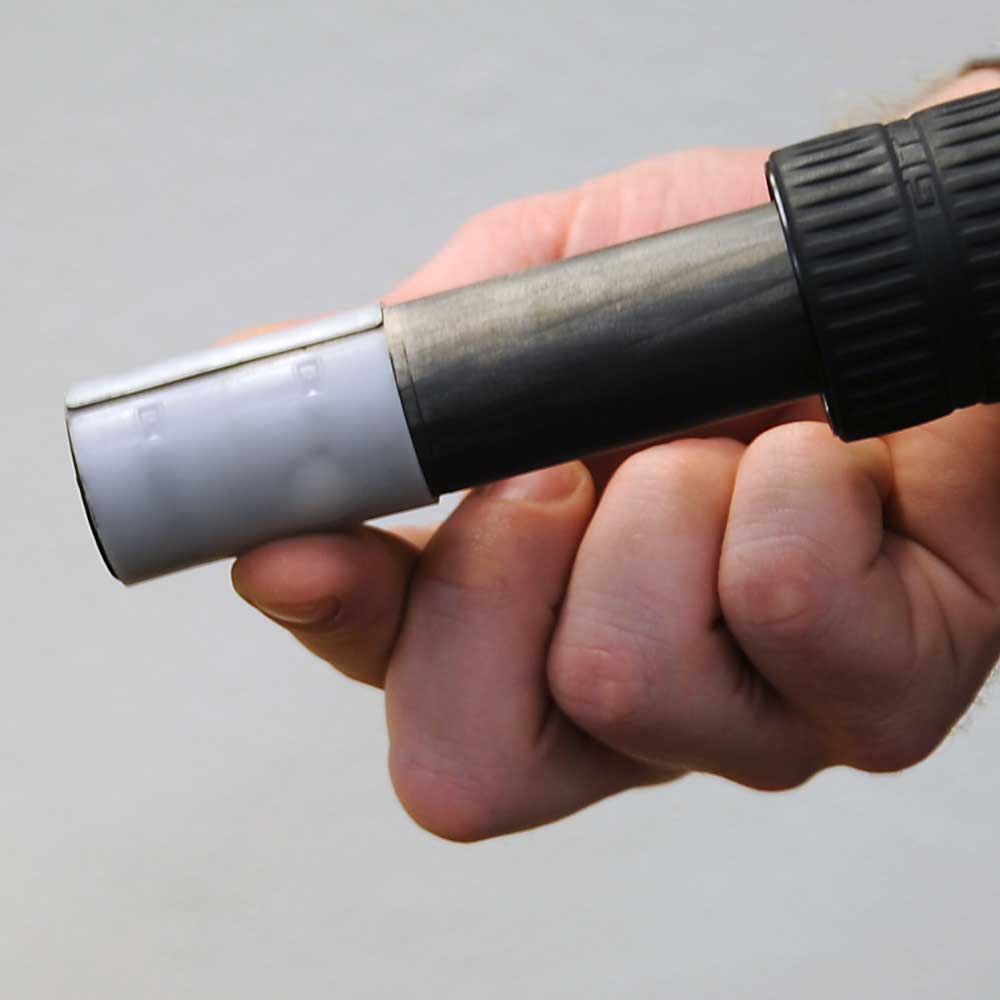
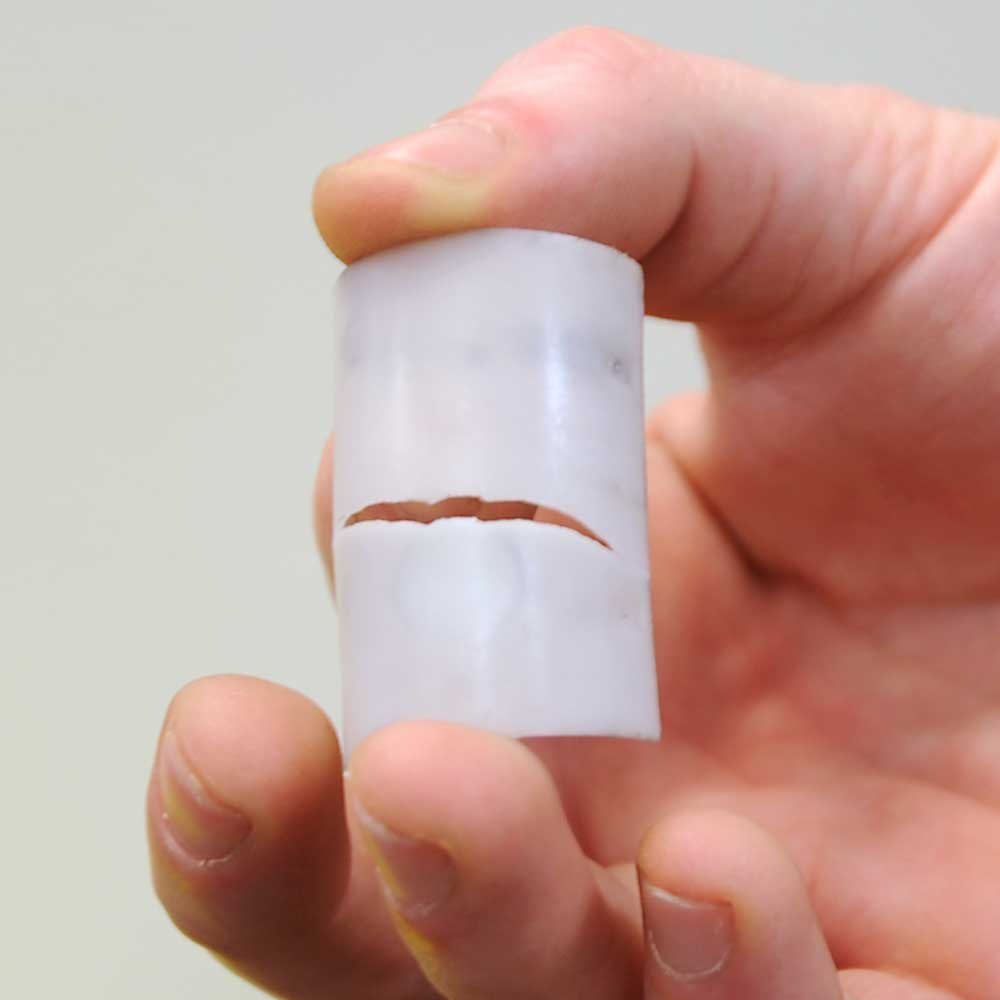
Gitzo 삼각대의 내부 플라스틱 조각은 흰색입니다. Before dropping these parts in the bin, inspect them for wear. 이러한 부품을 보관함에 떨어 뜨리기 전에 마모 여부를 검사하십시오.
Step 3B - Gitzo
이것은 잠재적 인 실패 지점입니다. If your anti-twist sleeve has failed, contact Really Right Stuff. 뒤틀림 방지 슬리브가 손상된 경우 Really Right Stuff에 연락하십시오.

Step 4
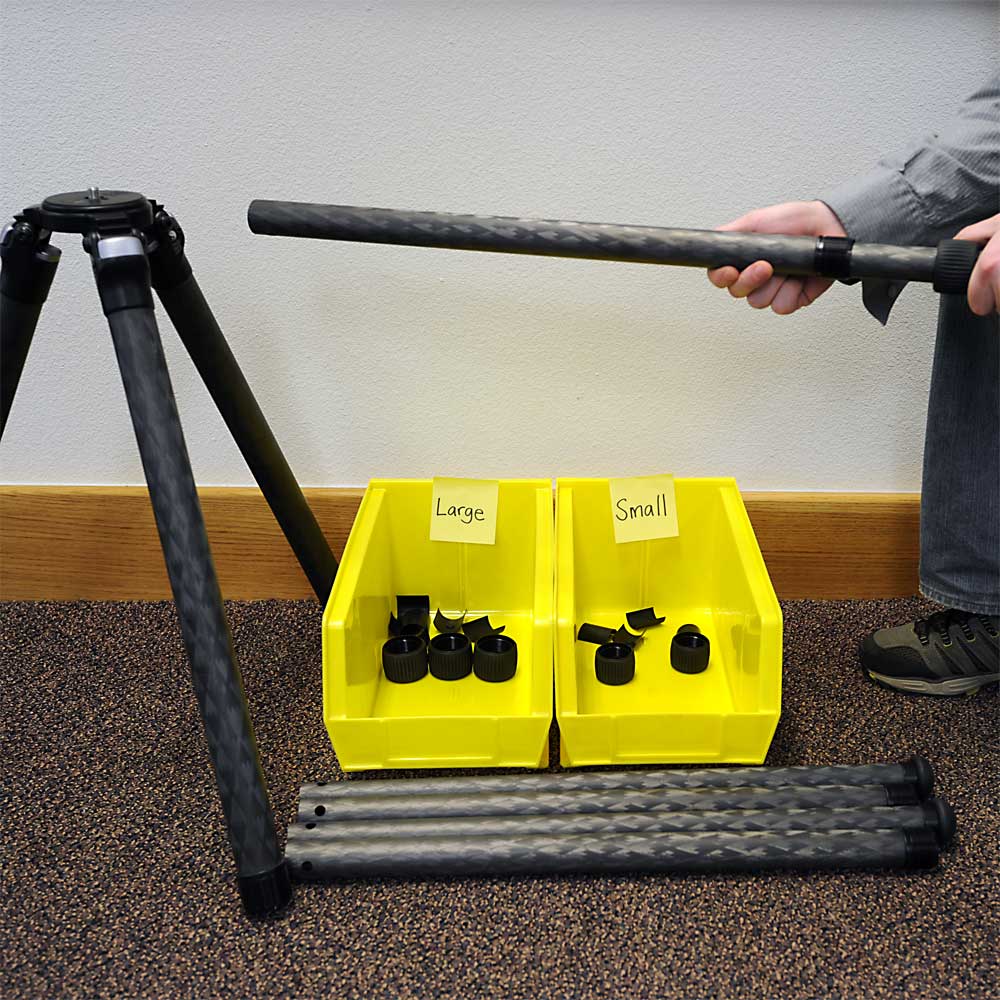
모든 하단 다리가 제거 될 때까지 위의 단계를 반복하십시오. Keep all the plastic pieces and twist locks from the top tube in one container. 하나의 용기에서 모든 플라스틱 조각과 상단 튜브의 잠금 장치를 비틀어 보관하십시오. We've marked our containers "Large" and "Small" to make sure we don't mix up the sizes. 크기를 섞지 않도록 컨테이너 크기를 "Large"및 "Small"로 표시했습니다.
Step 5
Continue removing all leg sections. 모든 다리 부분을 계속해서 제거하십시오.
Step 6
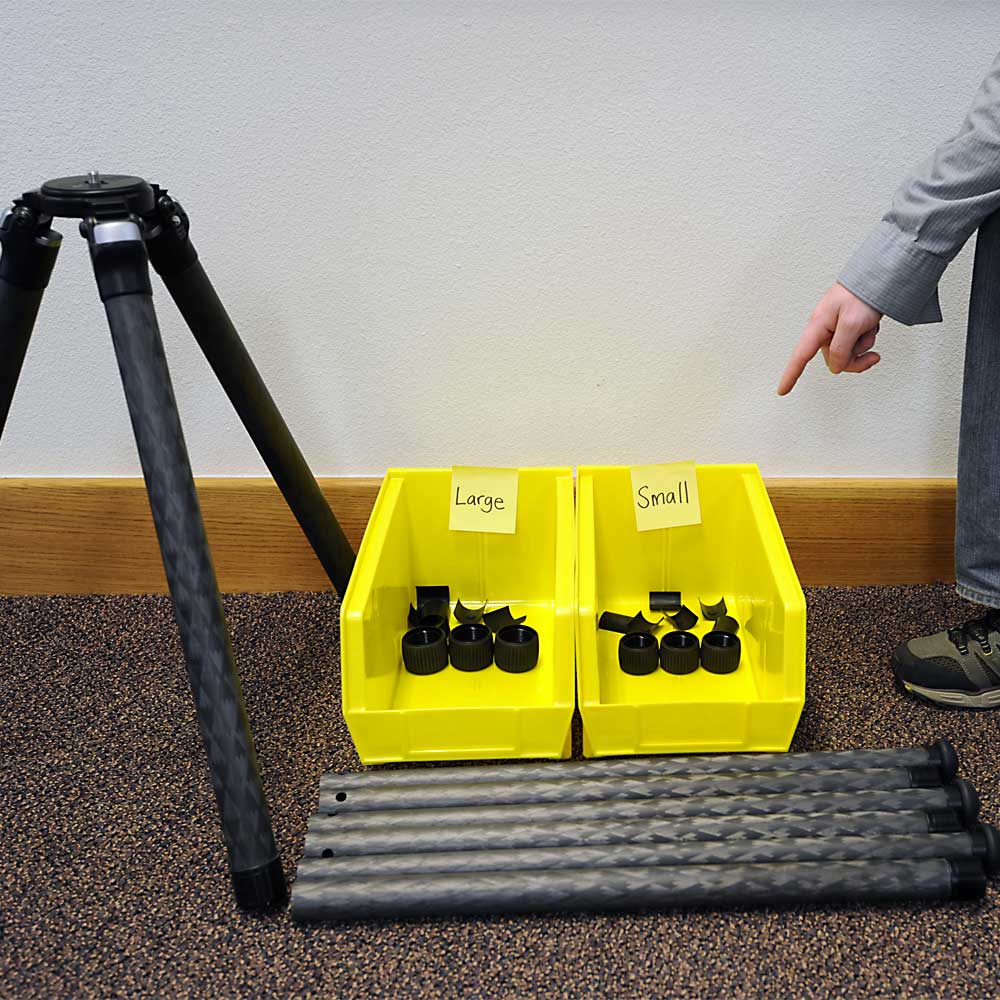
여기에는 우리의 모든 부분이 쓰레기통으로 분리되어 있습니다. Remember, if your tripod has 4 leg-sections per leg, you'll need to use 3 bins. 삼각대에 다리 당 4 개의 다리 섹션이 있다면 3 개의 상자를 사용해야합니다.
Step 7
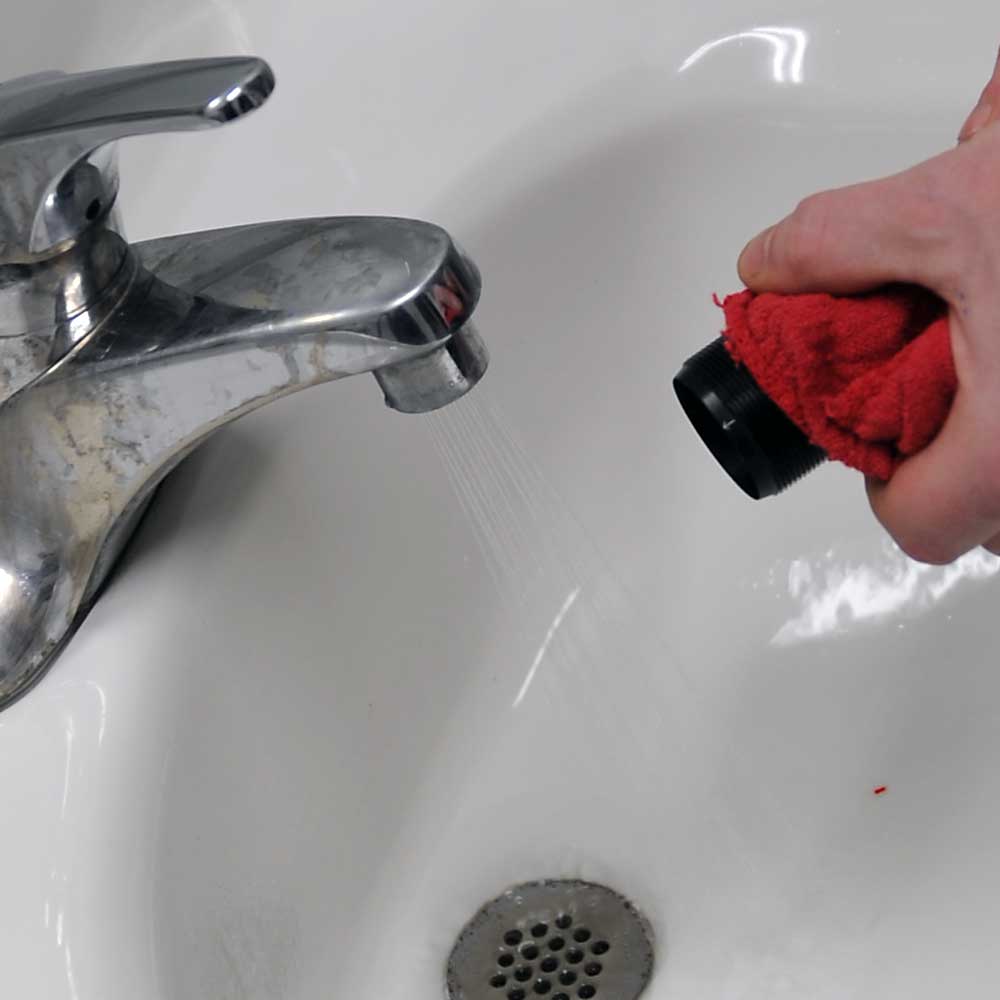
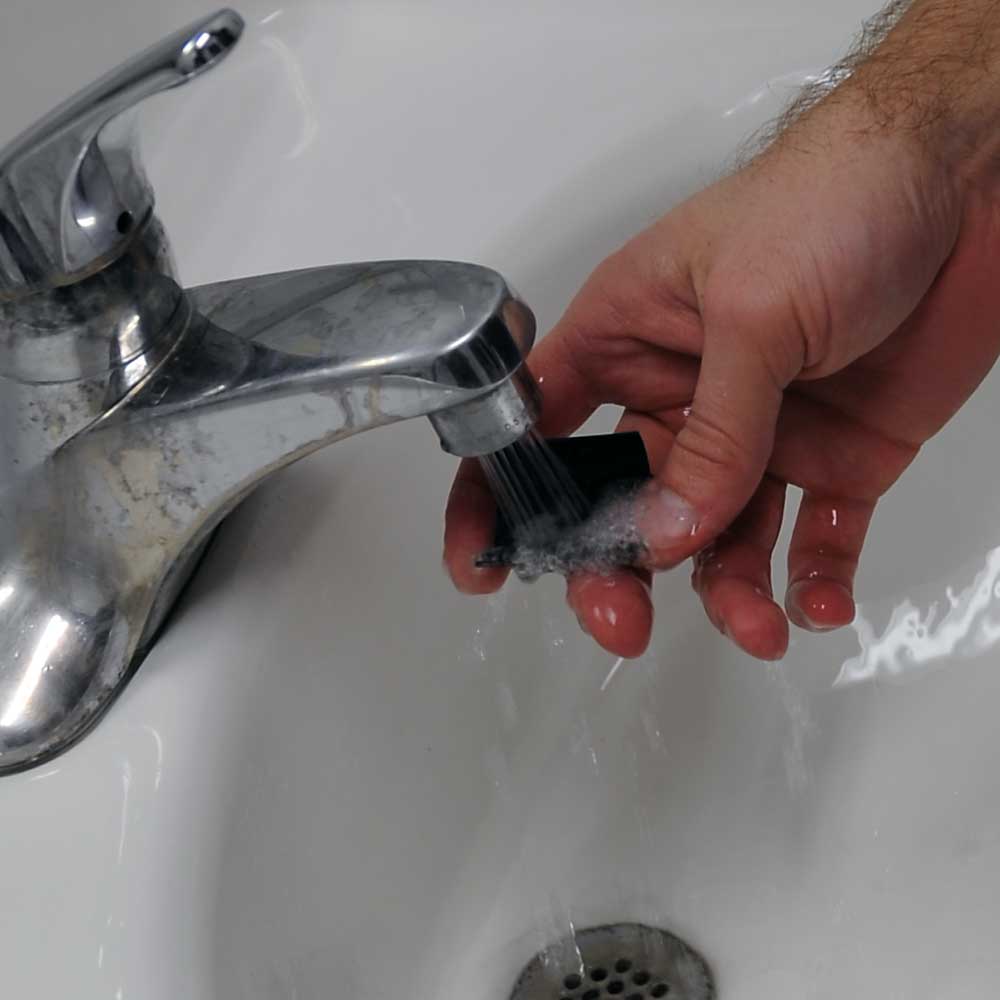
부드럽게 흐르는 물 아래에서 각 튜브의 나사산 끝을 헹구십시오. Rinse the entire tube if you've been in any salt water. 소금물에 들어갔다면 튜브 전체를 헹구십시오. You may have to use a soft toothbrush to help clear fine grit out of the threads. 스레드에서 미세 입자를 제거하는 데 도움이되도록 부드러운 칫솔을 사용해야 할 수도 있습니다.
Step 8
부드럽게 흐르는 물 아래에서 플라스틱 조각을 헹구고 잠금 장치를 돌리십시오. Inside each twist lock, rotate the internal plastic sleeve under the running water to rinse out any trapped grit. 각 트위스트 락 안쪽에있는 흐르는 플라스틱 아래에있는 내부 플라스틱 슬리브를 돌려 갇힌 모래를 헹구십시오. Continue rotating the internal plastic sleeve until it rotates smoothly and you can't feel any grittiness. 부드럽게 회전하고 거칠게 느낄 때까지 내부 플라스틱 슬리브를 계속 회전 시키십시오.
Step 9
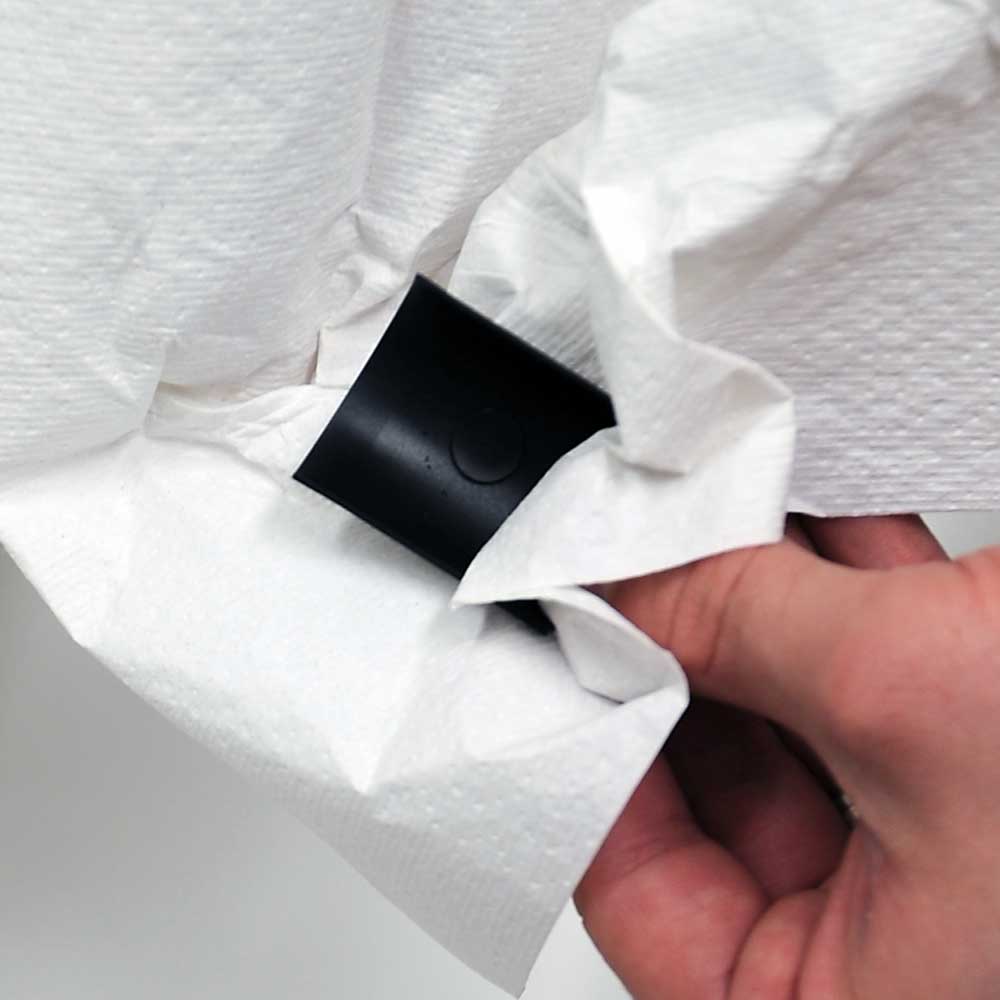
다리를 포함하여 각 조각을 완전히 말립니다.
Step 10
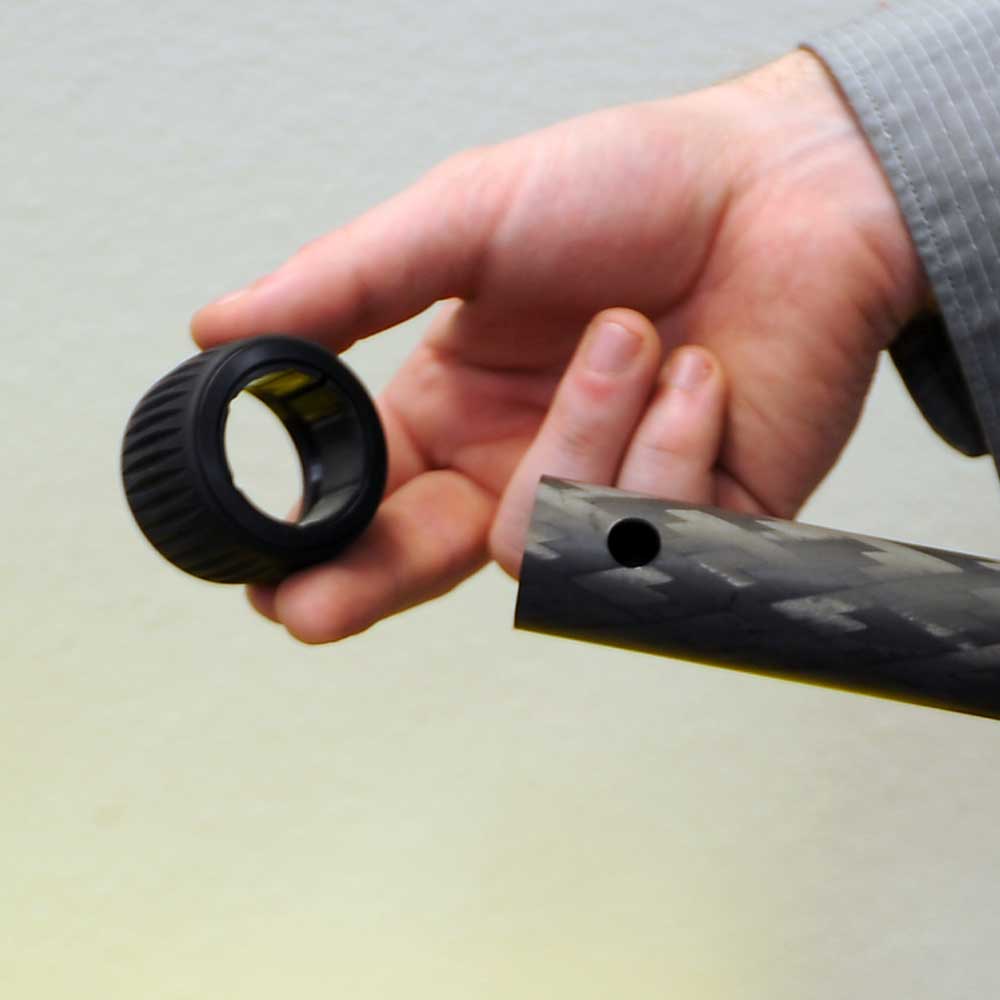
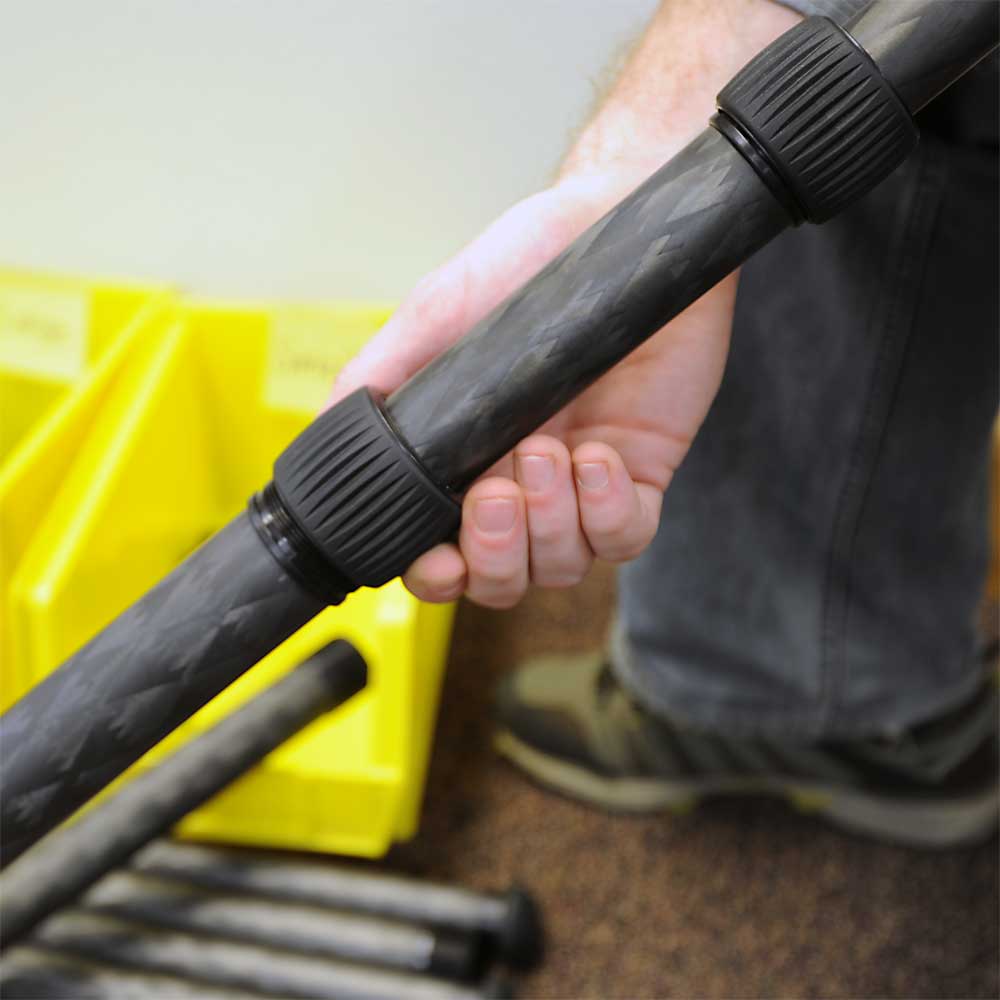
이제는 삼각대를 함께 되돌릴 시간입니다. Start with the largest leg sections first. 먼저 가장 큰 다리 부분부터 시작하십시오. First replace the twist lock on the carbon fiber leg section. 먼저 탄소 섬유 다리 부분의 트위스트 락을 교체하십시오. Orientation matters! 오리엔테이션은 중요합니다! The threads on the inside of the twist lock should go onto the carbon fiber leg first. 트위스트 락 안쪽의 나사는 먼저 탄소 섬유 다리 위로 가야합니다.
Step 11
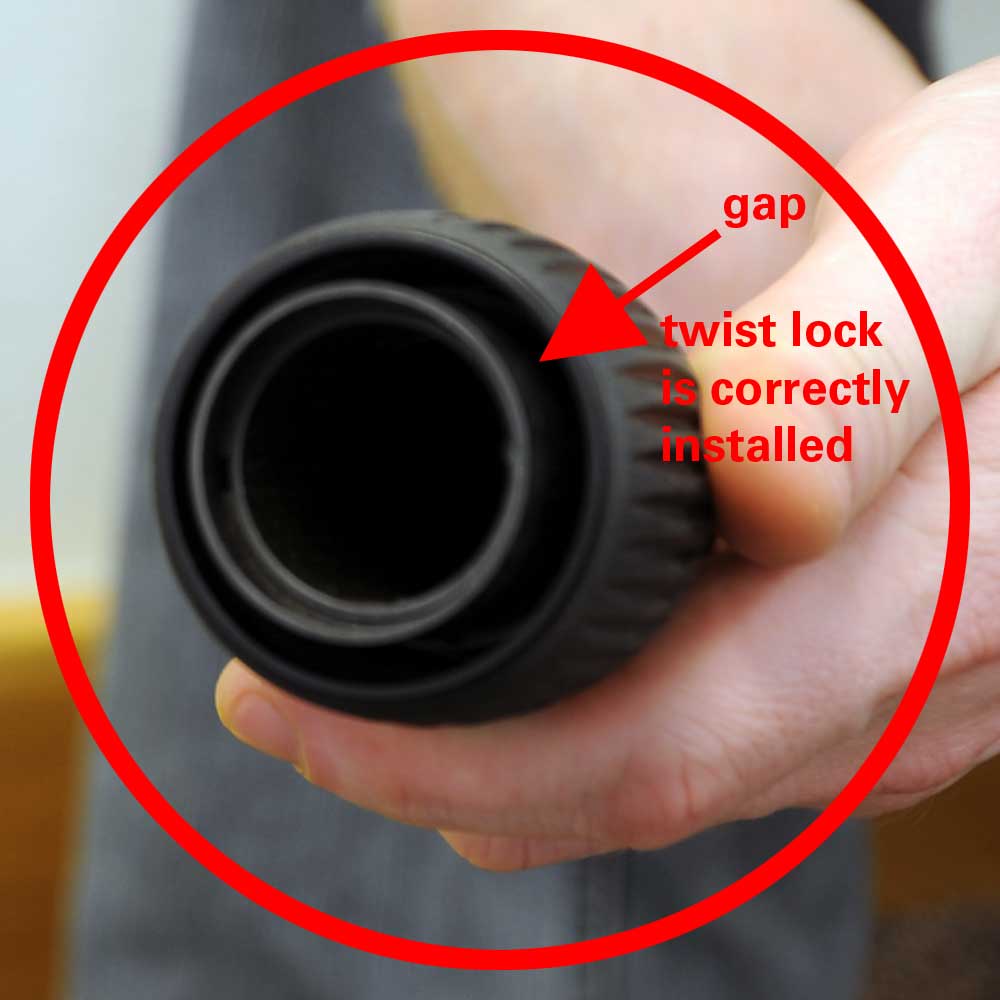
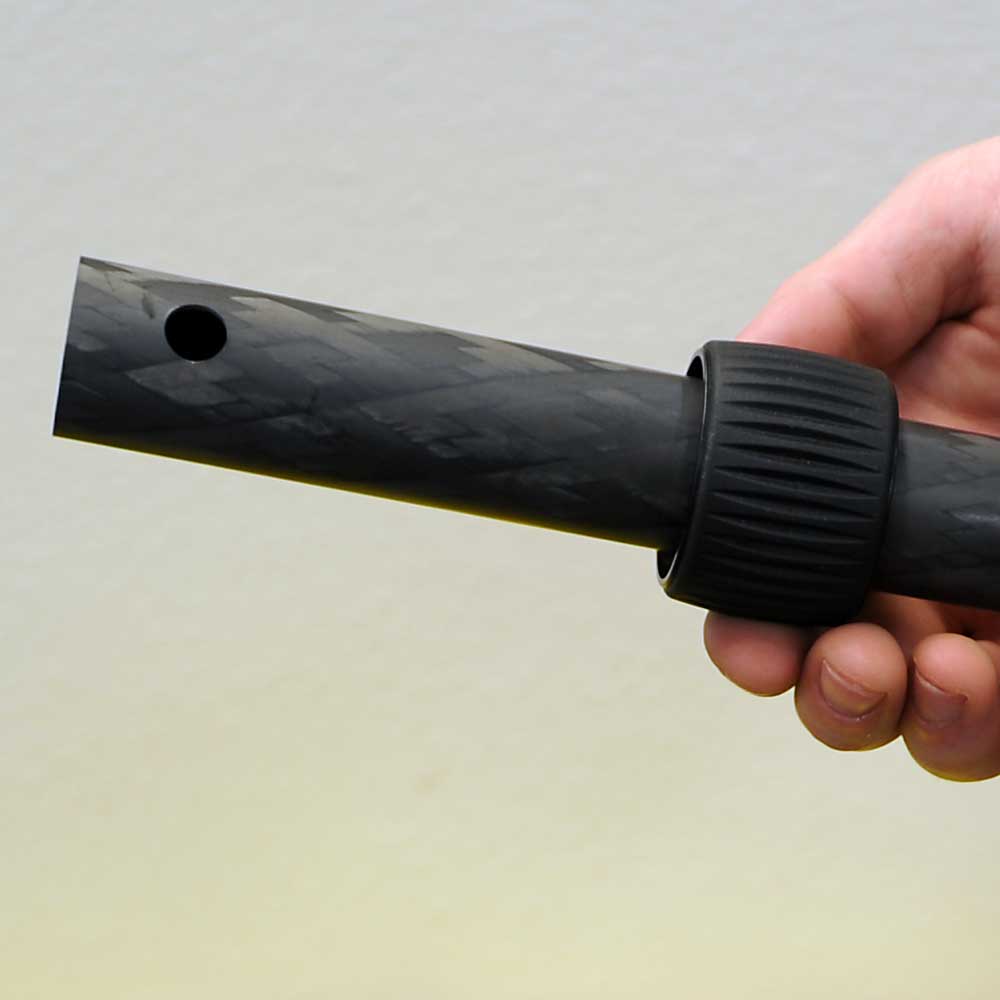
이 이미지는 올바르게 설치된 트위스트 락을 보여줍니다. You should be able to see a gap between the leg section and the twist lock. 다리 부분과 트위스트 락 사이의 틈을 볼 수 있어야합니다.
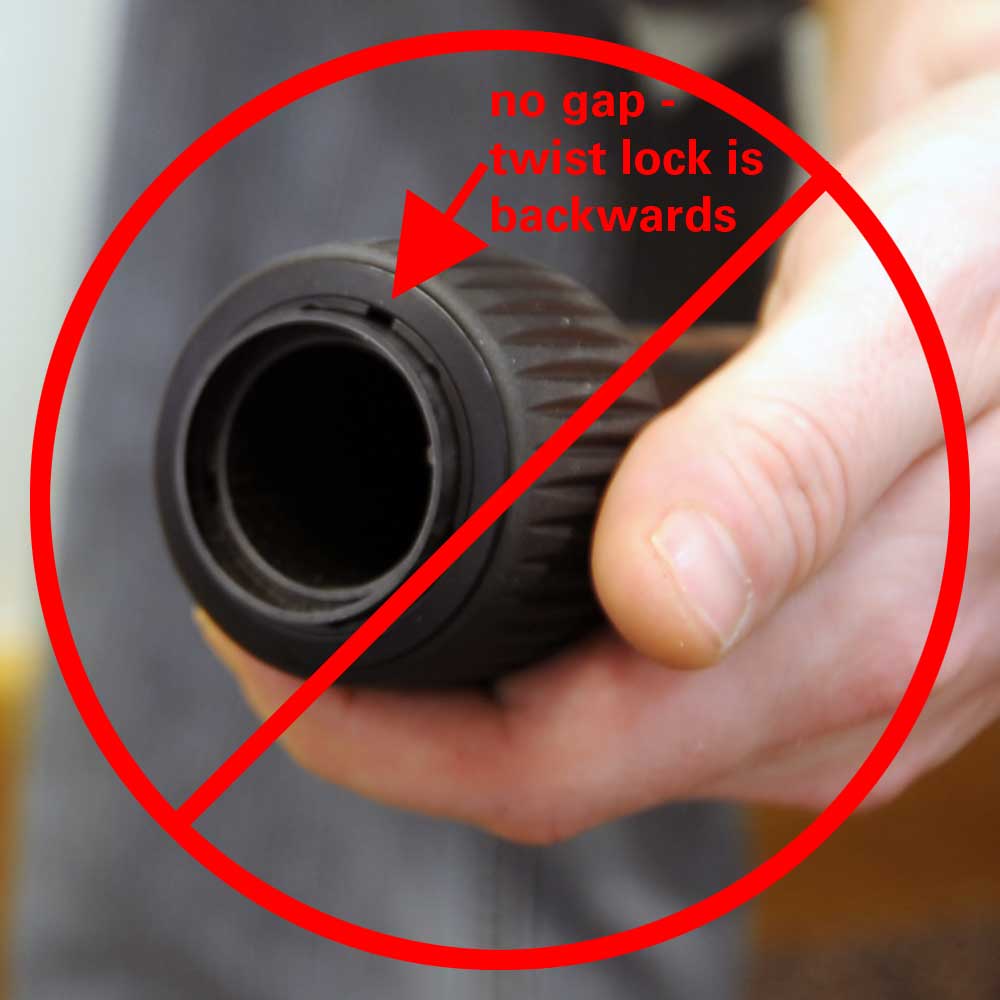
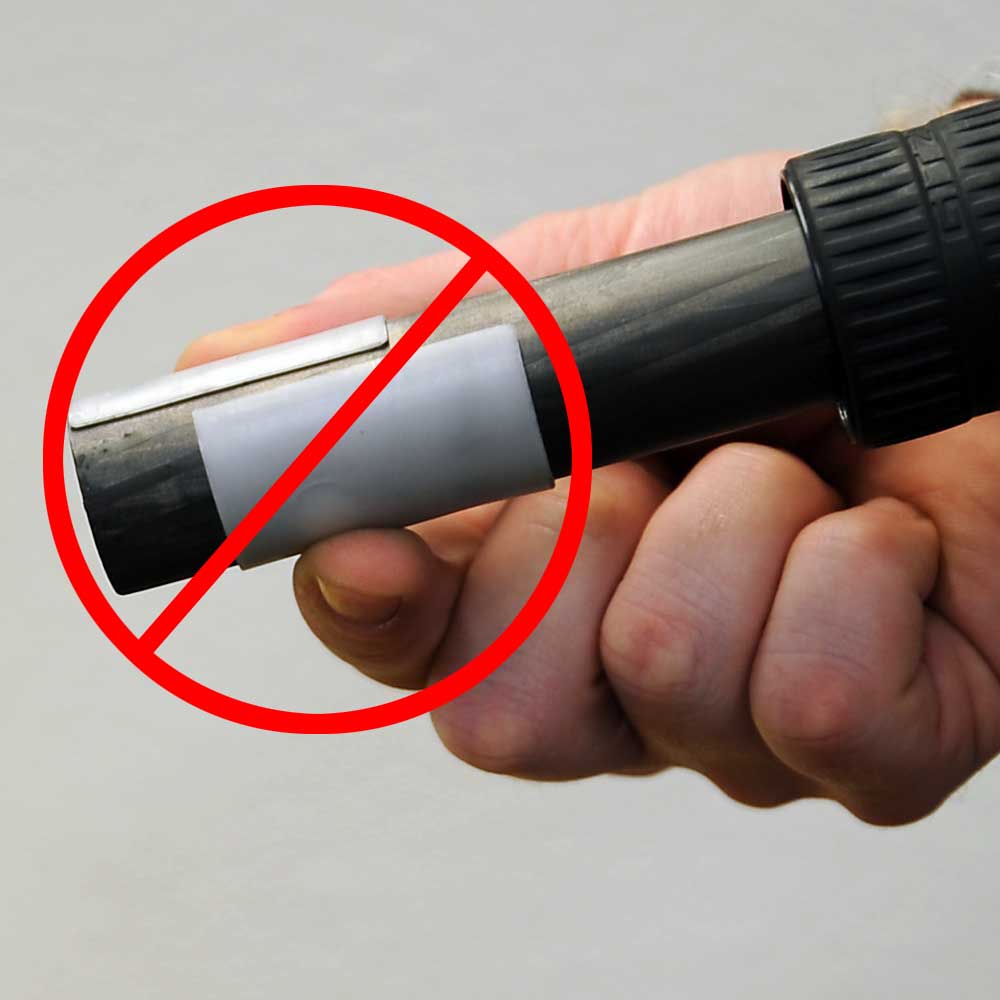
Step 12
이 이미지는 잘못 설치된 트위스트 락을 보여줍니다. There is no gap between the leg section and the twist lock. 다리 부분과 트위스트 락 사이에는 틈이 없습니다.
Step 13
트위스트 락을 다리 부분 아래로 밀어냅니다.
Step 14
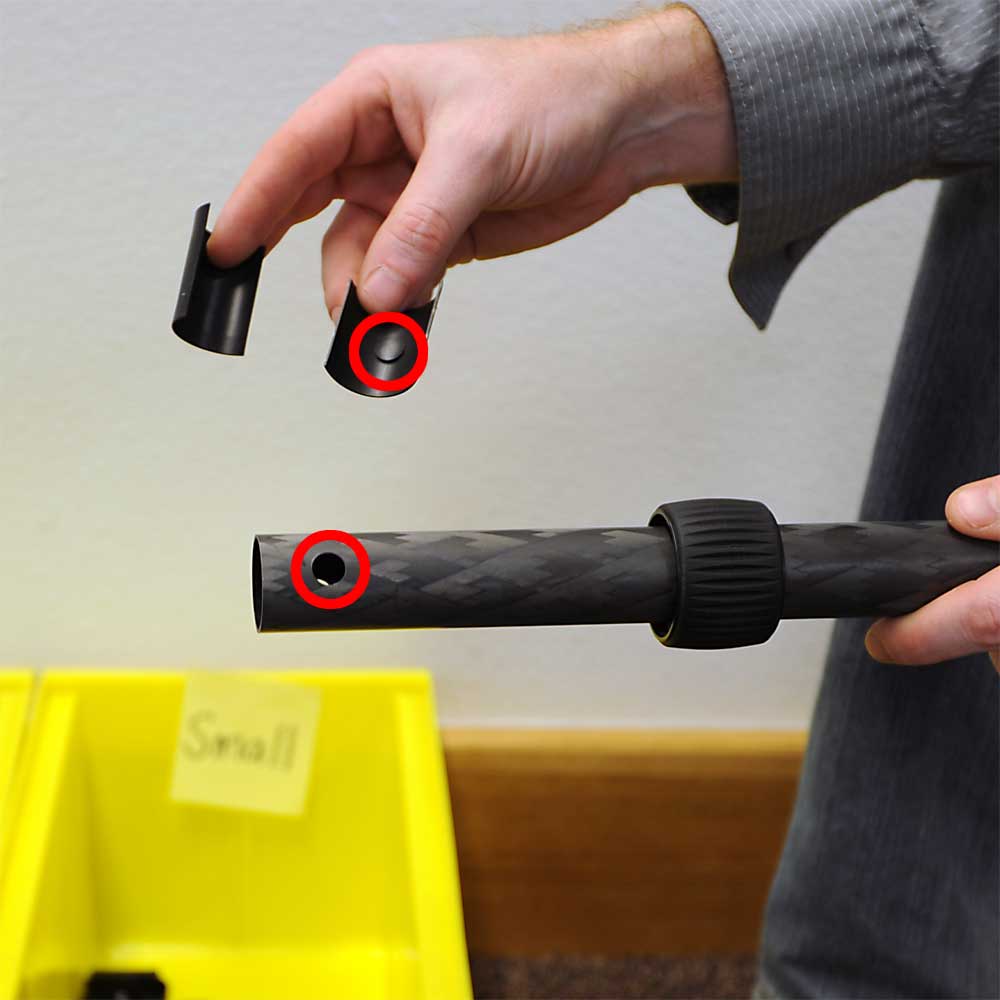
"Large"라고 표시된 빈에서 두 개의 플라스틱 조각을 꺼내고 각 플라스틱 조각의 내부를 살펴보고 다리 부분의 끝에있는 구멍에 떨어지는 내부의 둥근 부분이 위로 올랐습니다.
Step 15
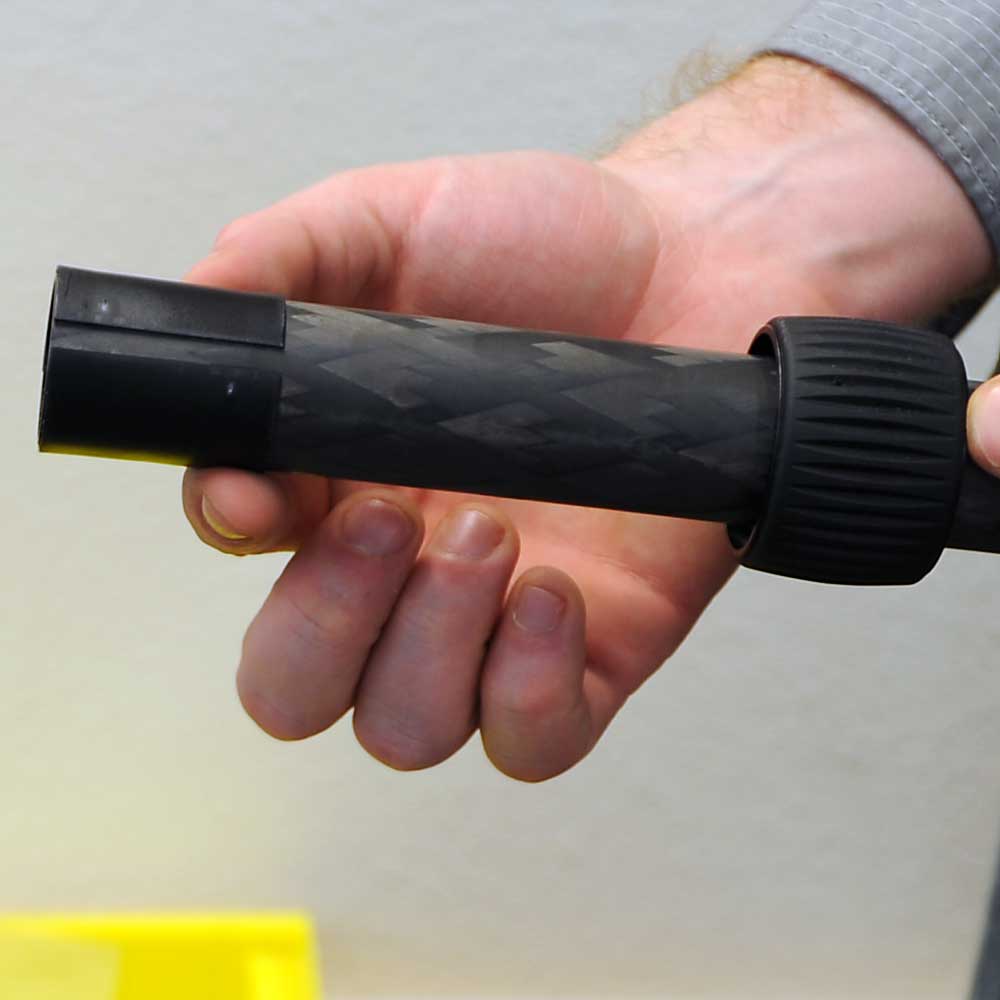
오리엔테이션은 플라스틱 조각에 상관 없습니다. As long as the raised round area drops into the hole they are installed correctly. 둥근 부분이 구멍에 떨어지면 올바르게 설치됩니다. There will be an obvious gap between the two plastic pieces. 2 개의 플라스틱 조각 사이에는 명백한 간격이있을 것입니다.
Step 15A - Gitzo
플라스틱 조각의 방향은 Gitzo 삼각대에서 중요합니다. Be sure you properly align the plastic pieces so that they are NOT offset as shown in this image. 이 그림과 같이 오프셋되지 않도록 플라스틱 조각을 올바르게 정렬하십시오.
Step 16
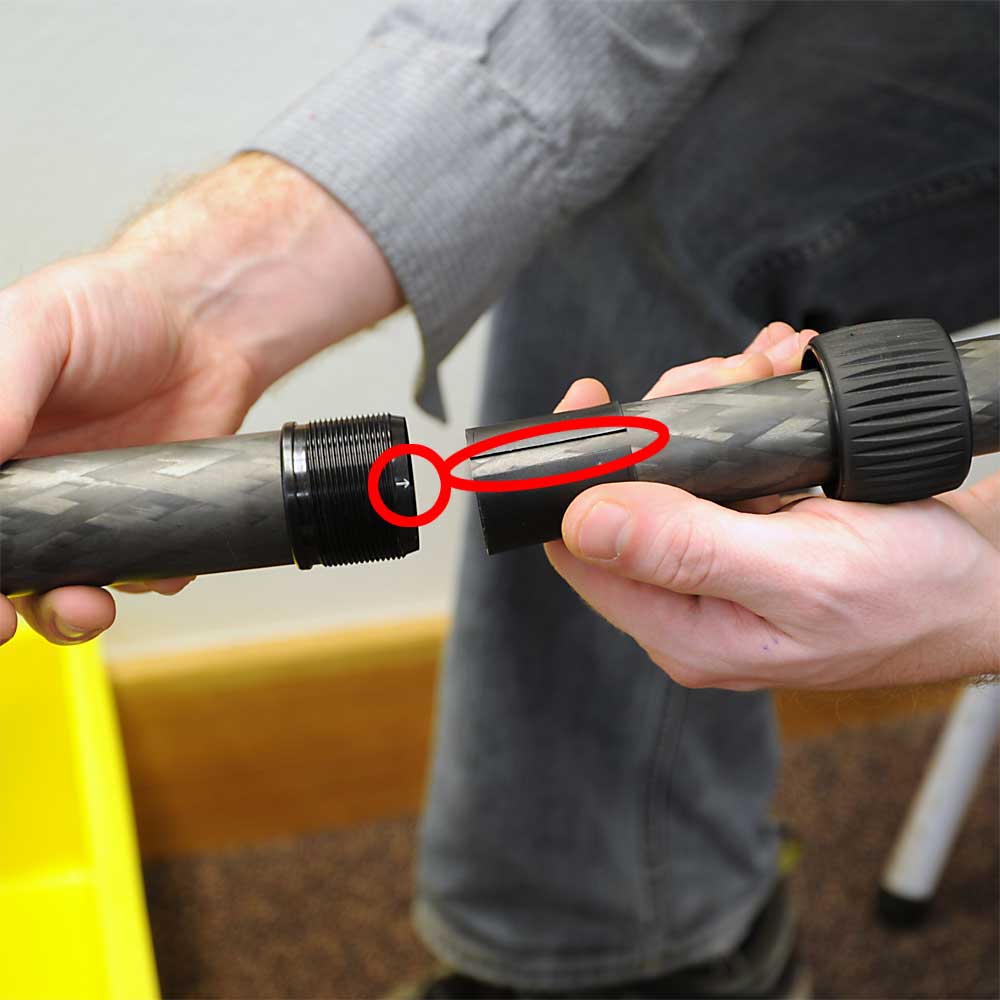
이제 삼각대 꼭대기에 부착 된 다리 부분을 잡으십시오. At the end of this tube you will see a very small white arrow. 이 관의 끝에서 매우 작은 흰색 화살표가 보입니다. Line up the gap between the plastic pieces from Step 15 with this arrow and insert the leg section. 단계 15에서 나온 플라스틱 조각 사이의 간격을이 화살표로 맞추고 다리 부분을 삽입하십시오.
Step 17
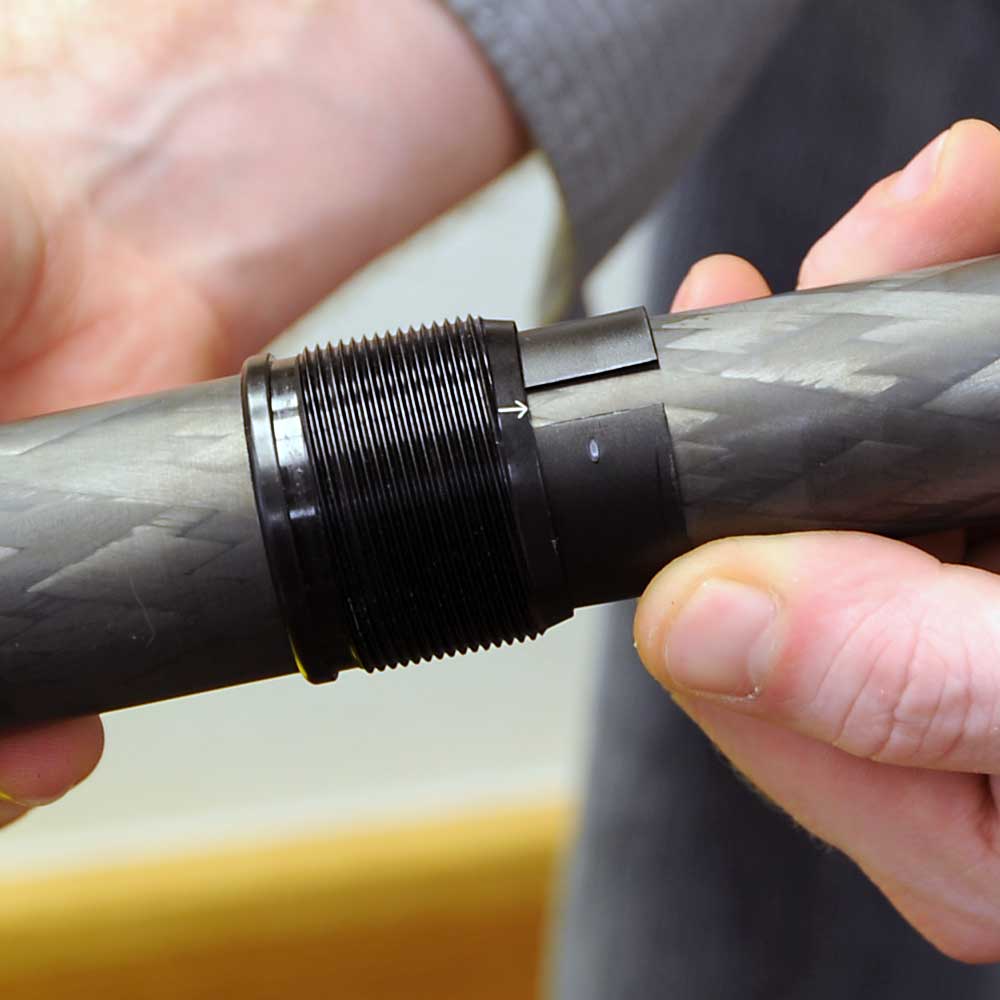
다른 것을하기 전에 방금 삽입 한 다리 부분의 다른 쪽 끝을보십시오. The threaded end of this leg section also has a white arrow, and this arrow should also be lined up with the first white arrow. 이 다리 부분의 나사산 끝 부분에도 흰색 화살표가 표시되어 있으며이 화살표도 첫 번째 흰색 화살표로 줄 지어 있어야합니다. If it is not, remove the leg section, rotate it 180°, and re- insert. 그렇지 않으면 다리 부분을 제거하고 180 ° 돌려서 다시 삽입하십시오. All of the white arrows on each complete leg should line up when you're all done. 모두 완료되면 각 다리의 흰색 화살표가 모두 정렬되어야합니다.
Step 18
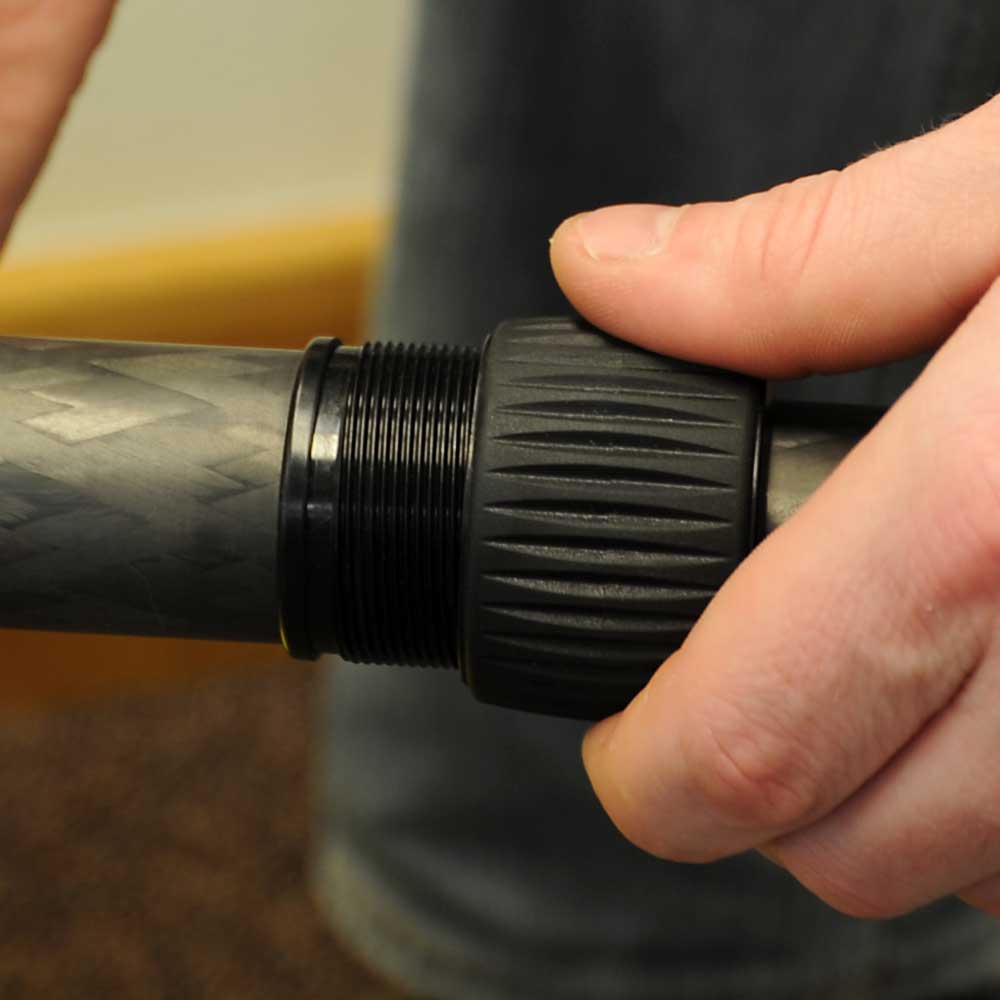
트위스트 락을 밀어서 위쪽 다리 부분에 끼 웁니다. Apply a very small amount of lubricant on the threads to lubricate the twist locks. 트위스트 락에 윤활제를 바르기 위해 실에 아주 적은 양의 윤활유를 바릅니다. Beware that lubricant can also attract dirt and grit, so don't overdo it. 윤활제는 먼지와 모래를 끌어 당길 수 있으므로 너무 많이 사용하지 마십시오.
Step 18A
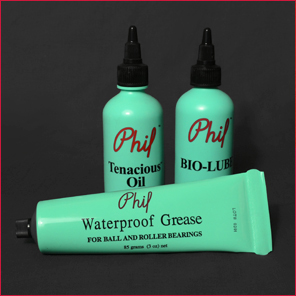
트위스트 잠금 장치 에는 Phil Wood 방수 그리스 를 사용하는 것이 좋습니다. Add one or two drops of this thick oil to the threads, then rotate the twist locks back and forth to evenly distribute. 이 두꺼운 오일 한 방울 또는 두 방울을 실에 넣은 다음 뒤틀린 자물쇠를 앞뒤로 돌려 균등하게 분배하십시오. Waterproof Grease is the best lubricant we've found for this application. 방수 그리스는이 적용 분야에서 가장 우수한 윤활유입니다. Also, we like the fact that all Phil Wood products are made in the USA - they are completely designed, manufactured and assembled in San Jose, California. 또한 필 우드 제품은 모두 미국에서 생산되는 것을 좋아합니다. 캘리포니아 주 산호세에서 완전히 설계, 제조 및 조립되었습니다.
Step 19
나머지 다리 섹션 모두를 계속하십시오. Look over the entire tripod and make sure everything is in its place, that you don't have any leftover pieces, and that the twist locks are all working. 전체 삼각대를 살펴보고 모든 것이 그 자리에 있는지, 남은 조각이 없는지, 트위스트 잠금 장치가 모두 작동하는지 확인하십시오. You're done! 끝났어!

 마킨스 BV헤드킷 Q10i-Q i-Lever + BV-12
 Gitzo 삼각대 유지 관리 가이드